If you are using a Amazon Linux 2 based Ec2 instance, to install and run postgresql tools like psql and pg_dump, today the highest versions of postgres tools available from the repository is postgres 14. You can check the currently available versions using the following command
amazon-linux-extras | grep -i postgre
amazon-linux-extras | grep -i postgre
  6  postgresql10             available    [ =10  =stable ]
 41  postgresql11             available    [ =11  =stable ]
 58  postgresql12             available    [ =stable ]
 59  postgresql13             available    [ =stable ]
 63  postgresql14             available    [ =stable ]
This command will list versions postgres 10 through 14.
You can enable the Redhat repositories for postgres on your amazon linux 2 host, and install the postgres 15.x client from those repositories. The steps are as follows.
Upgrade to the latest version of amazon linux 2 (Optional)
If you already have a postgres package installed consider removing it.
Using the postgres docker image, is the quickest way to get started with any of your postgres development environments, or if you need to test any features of the postgres database. Official postgres database images are available for download and use from docker hub. You can get images of postgres 11,12,13,14 and 15 from docker hub. In this blog post we will see how to get started with downloading and running this image on Ubuntu Linux.
The steps outlined below assume that you have one of the newer versions of ubuntu installed on a host and that you are using the linux user named “ubuntu” to run docker.
As root execute the following commands on the ubuntu host to download docker. These steps also setup the ubuntu user to run docker containers.
Now you are ready to download and run the postgres container.
Login as the “ubuntu” user and Create a text file named pg.yaml file, that has the following instructions. The following instructions assume that you have a directory /u01/pg/data which you want to use to store your postgres datafiles.
Now we can run docker to download and run this image using the following command
docker compose -f /home/ubuntu/tmp/pg.yaml up -d db
This command downloads and installs the latest postgres image (Which at the time of writing is 15.2) You can now connect to the postgres database from the ubuntu host as shown below.
psql -h localhost -p 5432 -d postgres -U postgres
You can login as root to your postgres container using the command below
docker exec -it cc18a27f8850 bash
where cc18a27f8850 is the container id (You can get your container id by running the command, docker container ls -a.
Once you are logged in as root to the postgres container, you can su – postgres and then run commands to stop and start postgres. pg_ctl can be found in /usr/lib/postgresql/15/bin.
Elasticsearch is an opensource text search engine. It is accessible using RESTFul API’s and uses JSON documents to store data. It allows users to search very large amounts of data at a very high speed. Since it is written using the Java programming language it can run on many platforms. See this blog post on how to install, configure and start Elasticsearch 8.5.0.
In this blog post I will show you how you can create an index, insert data into the index and query the data in Elasticsearch. In the rest of this post, I assume that you are executing the curl commands from the host that is running the Elasticsearch server. Hence all the curl queries are directed to localhost. If you are running the curl commands from a client machine, replace localhost with your actual hostname (or ip address) for the server running Elasticsearch.
Inserting a single document into an Index
curl -k -POST https://localhost:9200/messages/_doc -H "Content-Type: application/json" -d'
{
  "msg_id" : 1,
  "msg_case_id" : 55,
  "msg_message" : "Hi This is xyz from def media company"
}' --user "elastic:Password1"
In the command shown above, “messages” is the Index that we are inserting the document into. We are also providing the Elasticsearch username and password to set the POST requirement to Elasticsearch. The -k is used to tell curl to accept the selft signed certificated from Elasticsearch.
Bulk inserting documents into an Index
First create a file named msg.json with the following lines
{"index":{"_id":"1"}}
{ "msg_id" : 1, "msg_case_id" : 55, "msg_message" : "Hi This is xyz from def media company" }
{"index":{"_id":"2"}}
{ "msg_id" : 2, "msg_case_id" : 55, "msg_message" : "We provide targeted advertising to different platforms" }
{"index":{"_id":"3"}}
{ "msg_id" : 3, "msg_case_id" : 55, "msg_message" : "Includes TV, Radio, Online, Social Media etc" }
{"index":{"_id":"4"}}
{ "msg_id" : 4, "msg_case_id" : 55, "msg_message" : "Our conversion ratios are very high" }
{"index":{"_id":"5"}}
{ "msg_id" : 5, "msg_case_id" : 55, "msg_message" : "provides search engine optimization" }
You can batch insert all the documents in the file above to the Elasticsearch index named “messages” using the command below
Elasticsearch is an opensource search engine based on the Lucene library and Kibana is an opensource data visualization dashboard for Elasticsearch. In this post I will show you how to install Elasticsearch and Kibana on a virtual machine (In this case running the Amazon Linux 2 Operating System).
cd /home/ec2-user/
curl -O "https://artifacts.elastic.co/downloads/kibana/kibana-8.5.0-linux-x86_64.tar.gz"
tar -xzf kibana-8.5.0-linux-x86_64.tar.gz
chown -R ec2-user:ec2-user /home/ec2-user/kibana-8.5.0
cd /home/ec2-user/kibana-8.5.0/config
Add the following lines to kibana.yml
server.host=<your-host-ip-address>
In the line shown above, make sure to replace <your-host-ip-address> with your hosts actual ip address.
Start Elasticsearch and Kibana
cd /home/ec2-user/elastic/elasticsearch-8.5.0/bin
nohup ./elasticsearch -Epath.data=data -Epath.logs=log" &
cd /home/ec2-user/kibana-8.5.0/bin
nohup ./kibana &
Setup a new password for the Elasticsearch superuser
cd /home/ec2-user/elastic/elasticsearch-8.5.0
bin/elasticsearch-reset-password -u elastic --interactive
follow the prompts to setup a new password for the user elastic.
At this time elasticsearch has been installed and started and you can start creating your indexes and running your queries.
I had to go through some additional package installations on Ubuntu 15.10 to get the webex client working from a FireFox browser.
Even though I was getting prompted to install the plugin and the plugin got installed, and i was getting to the Webex screen, I was unable to view the screens being presented via Webex. This is happening because there are a lot of libraries that the plugin needs, (In order to work properly) that are missing after the base install of Ubuntu 15.10.
You can find the list of missing libraries by
Open a terminal with a command line prompt
cd .webex
cd 1524 (Or whatever your directory is named)
ldd *.so | grep -i ‘not found’
I had to perform the following steps to get all these libraries installed
Downloaded and installed jre 32 bit into /u01/Rk/Apps/Java/jre32 (You can install it wherever you want to, just make sure you set LD_LIBRARY_PATH to the correct directory, in the next step)
Added following directories to the LD_LIBRARY_PATH setting in .bash_profile
After the above mentioned packages were installed, ldd did not report any missing libraries, and I was able to view and present using webex from FireFox.
Using Plug and play devices on Linux is probably not the best experience one can have. Usually it involves installing drivers, editing configuration files and reading online forums to find fixes. So i was pleasantly surprised when I signed up for a Idea Cellular 3g Broadband access, and it just worked.
It must be the popularity of Linux distributions on laptops, that had prompted Idea (And the maker of the device HUAWEI) to provide drivers on the device, that can be used for the installation. Even though their printed installation instructions (Included with the USB package) say nothing about installing on Linux, i was able to get it installed and working with no issues.
It made me so happy that it worked out of the box, that i had to blog about it and let the world know.
My laptop runs 64 bit Ubuntu 14.04 Trusty Tahrir.
Make sure that Idea has enabled your SIM for use in their network (This is a process that can take upto 48 hours after you have bought the device and signed up for their service).
In my case i signed up for a pre-paid connection that gives me 3Gb of usage in a month. (Atleast that is my understanding at present).
Take the SIM card provided in the box, and insert it into the USB device. Ensure that you push the SIM card all the way in (Or else it will say SIM card not detected as you try the install).
Now insert the USB device to a USB port on your laptop.
Start a terminal and login as root
sudo su -
cd to the usb device (You may have to replace the path below with your correct path name, to the usb device for your laptop)
cd /media/rramdas/Idea\ Net\ Setter/
Run the installer
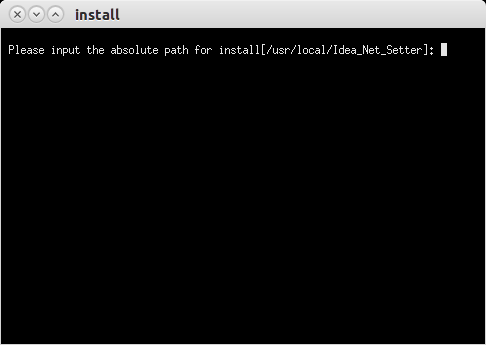
sh ./install_linux
It will prompt you for the location to install the software. Accept the default location /usr/local/Idea_Net_Setter
It completes the install and configuration and then asks you to register
Click on register now, and enter your e-mail ID and Mobile phone#, they will text you a password, enter that.
Once you have registered you will see the following screen.
Click Connect and it connects you to the mobile broadband. Clean and simple.
From hereon every time you reboot your laptop and re-insert the USB device, the o/s will automatically detect that the usb device is a netsetter broadband modem, and prompt you with the screen to connect.
You can bring up the Idea connection manager screen by invoking search and just typing in “Idea”. This application shows you a wealth of information including your current utilization, and the upload and download speeds you are getting. Pretty awesome if you ask me.
As Oracle Dba’s we often come across situations where we are handed CSV (Comma separated values) files, by our managers, or customers, as Raw data, based on which we need to do some work. The first task would be to analyze the file and come up with some summary satistics, so we can quantify the amount of work involved.
When faced with such circumstances, my favorite method is to use sqlloader to upload the file into a database table, and then run sql statements on the data to produce summary info. Most people would probably use excel, formulas, macros and pivot tables to achieve similar results.
In this blog post, i present an alternate method that i’ve been using recently, for csv file summarization.
Pandas is a library written for the Python language for data manipulation and analysis. In order to proceed, first install Python and then install the Python package named ‘pandas’. Pandas is a real good alternative to the R programming language.See my previous post on how to install python and pandas.
Check how many games the dataset covers. The GameId column is a unique identifier that identifies each game. The nunique method returns the number of unique elements in that object.
df.GameId.nunique()
256
List details of all games played by the New England Patriots. This command shows how you can provide a filter condition. The filter specifies that all the rows, where the OffensiveTeam is NE or DefensiveTeam is NE be listed.
Display all Pass and Rush plays Executed by New England. Here we are using a and filter condition to limit the rows to those of New England and the PlayType is either a PASS or a RUSH.
This post is equally applicable to Rac databases deployed, both on oracle database machines as well as traditional server/storage architectures, running RHEL5 or OEL5 (OEL6 has a new feature called transparent hugepages).
High amounts of memory and cpu consumption can result in some real bad things happening (Like for eg: Node evictions). So it is important to configure the operating system and the databases you deploy on the machine optimally, to use the available CPU and memory resources.
Let us first review what those available memory and cpu resources are on an Oracle Exadata Database Machine, on each database node.
[table “1” not found /]
Anytime a workload is deployed on a database server, that exceeds the, operating systems ability to efficiently use the above mentioned, available cpu and memory resources, bad things can happen. (I know i am over simplifying in the prior comment, but you get the idea).
Managing Memory Resources.
Setting up HugePages
First we need to make sure that HugePages on each node, is setup correctly, for the databases you have deployed on the node.
Tanel Poder has explained the reasons for setting up HugePages on Exadata systems.
When the database machines are installed, the HugePages is configured to accomodate the one database that is pre-installed. So if you change the SGA setting for that database or deploy more databases you should now adjust the HugePages setting accordingly. It goes without saying that if you have already configured the hugepages to accomodate all the databases you have, and then you removed some databases from the node, or resized the SGA’s to be smaller, you should again resize your hugepages to free up the excess hugepages.
Once all the database instances are configured and started up you can run the script, hugepages_settings.sh from Mos Note 401749.1, which calculates the number of hugepages you need to setup. I usually recommend adding 10% to the value that hugepages_settings.sh suggests.
With 11.2.0.2 and 11.2.0.3 you should also be setting USE_LARGE_PAGES, preferably to ONLY, following the instructions in Mos Note 1392497.1.
You can then follow the instructions in MOS note 361323.1, under the section “Kernel version 2.6”, to set the value. You need to restart the databases so the SGA gets allocated with the hugepages.
You should also follow instructions from MOS note 1546861.1, and set the value of vm.min_free_kbytes = 524288, in /etc/sysctl.conf, to avoid page allocation failure messages when kernel memory is depleted.
Managing Memory Usage
Ideally for critical implementations, your SGA+PGA+Individual server processes, memory allocations should not exceed 75% of the physical memory on the database node.
The Exadata consolidation white paper above suggests that
For critical Hardware Pools, we recommend an even more conservative approach by not exceeding 75% physical memory per database node. OLTP applications:
SUM of databases (SGA_TARGET +PGA_AGGREGATE_TARGET) + 4 MB * (Maximum PROCESSES) < Physical Memory per Database Node DW/BI applications:
SUM of databases (SGA_TARGET + 3 * PGA_AGGREGATE_TARGET) < Physical Memory per Database Node
You can monitor the pga usage a few different ways.
1) SELECT s.inst_id, s.sid, s.serial#, p.spid, s.username, s.program, p.pga_used_mem FROM gv$session s JOIN gv$process p ON p.addr = s.paddr AND p.inst_id = s.inst_id WHERE s.type != ‘BACKGROUND’ and s.program not like ‘%(P%’ and p.pga_used_mem > <APPLICATION_MEMORY_THRESHOLD>
order by s.inst_id, s.sid, s.serial#;
The value you use for APPLICATION_MEMORY_THRESHOLD is dependent on your application and howmuch pga it needs to efficiently run your queries (Performing the sorts in memory using the space for PGA is usually faster than using the TEMP tablespace). However the white paper suggests using 1Gb for OLTP applications and 10Gb for DSS applications.
2) You can monitor the sysmetric “Total PGA Allocated” from dba_hist_sysmetric_summary, to see how much PGA is being allocated.
3) You can use the “PGA Memory Advisory” and “SGA Target Advisory” sections of the awr report, to guage, the impacts of increasing or decreasing the SGA and PGA Allocations.
4) You can monitor the memory usage at the o/s level using the top (Mem: free),free or vmstat (bo (page-out),bi (page-in)) commands.
Managing O/S Processes (And as a consequence CPU usage).
It is important to control the number of processes that are actively executing on each node. Each of these processes consume cpu and memory resources.
The following guidelines are important to follow.
– Use Application connection pooling to appropriately limit the number of sessions connected to the oracle database.
This is important for two reasons.
– Right-Size the resource consumption on each database node.
– Minimize the impact of connection storms.
– Configure the parallel query servers appropriately.
– For all the database’s deployed on a node the total setting for PARALLEL_MAX_SERVERS should be less than or equal to the following
X2-2 or X3-2, <= 240
X2-8 or X3-8, <= 1280
I often see implimentations where parallel_max_servers = 240 (or a high value) in each instance on the machine, which results in not so good consequences. I have occassionaly seen systems where there is sustained 100% cpu usage with load averages of > 300, resulting in node reboots.
– Use Instance Caging and Database Resource Manager to manage cpu allocation on the server.
It would be a good idea to review the performance management screens from Enterprise Manager 12c every day to have a good understanding of the database and server workloads, and/or analyze the oswatcher data to understand the server workload profile.
In this previous post, i showed how to build a Virtual Box image, that runs the Oracle Linux 6 Update 4 x86-64 bit operating system. I set the image up with all the pre-requisites for installing the Oracle Rdbms 12c Release1. In this blog post i’ll describe the steps i executed to install a single instance, oracle 12c Oracle Home on Oracle Linux 6.
Download the Oracle 12c Software
Download the above two files to your desktop.
Scp them to the Oracle Linux 6 server.
I copied the zip files into a directory named /u02/sw (Owned by oracle) and unzipped both of them in that directory.
Directory structure
Since this is a test install, i am not really following the oracle best practices on separating the Oracle Base, Oracle Inventory location and Oracle Home. In my installation all these are going into /u01/12cr1
Setting up the X Display
Since the installer is a graphical user interface, we need to redirect the display to the client (Unless you are installing using a Vnc client, or logged into the Oracle Linux 6 virtual machine using a Gui).
I am running this on ubuntu linux, so my ubuntu linux desktop is the X client.
I login to the Oracle Linux 6 virtual machine using the following command, which redirects the display to my desktop.
ssh -X -l oracle 192.168.56.101
Install Oracle 12c Binaries
Login as the oracle user to the OEL6 virtual machine
cd /u02/sw/database
Invoke runInstaller as shown in the screen above
The 12c Logo displays
Click Next on the above 2 screens.
In the screen shown above, choose “Install database software only”. This way we install just the rdbms binaries and then we’ll create the database afterwards.
In the screen above choose “Single Instance database installation”.
In the Screen above choose “English” as the language.
In the Screen above, chooose “Enterprise Edition”
In the Screen above, choose the Oracle Base as “/u01/12cr1” and the Oracle Home as “/u01/12cr1/dbh1”
In the Screen above Choose the location of the Oracle Inventory as “/u01/12cr1/oraInventory”
In the above Screen, choose the defaults
In the screen above, the installer complains about the physical memory, shmall and shmmax.
In my case shmall and shmmax are set much higher than the values that oracle recommends.
If you have set the memory for the virtual machine to 2Gb as i mentioned in my previous post, the warning about the physical memory should not be present. So it is ok to ignore these warnings and proceed with the installation, as shown in the picture above.
The installer displays the installation locations. Click on “Install” to start the installation.
The installation proceeds as shown in the figure above.
After the binary installation, the installer prompts you to run two scripts.
Login as root, to the Oracle 6 virtual machine, from another screen.
Then click Ok on the screen above.
Click “Close” in the screen above to complete the rdbms binary installation.
In the next blog post, i will document the steps to create and start a Container database and Pluggable database.
Oracle Database 12c was recently announced (On June 1 2013) to be Generally Available for customers to use. I created a new Oracle Linux 6 virtual box, virtual machine and installed Oracle 12c Release 1 on it. So i’ll blog about the steps i used, with screenshots, in a 3 part blog series. This first one is this post, where i’ll document the steps i followed to create the Oracle Linux 6 – 64 bit virtual machine (In the next 2 posts i’ll document the process used to install the rdbms binaries and create the database).
Start the Oracle VM VirtualBox Manager from your program Menu
Click on “New”, you get the screen Below
Choose the Name as “OEL6” (Any name you want) and Type “Linux” and Version “Oracle (64 Bit)” as in the picture above, Click Next.
In the above screen, choose the file type to be “VDI”, Click Next.
Choose the file location and size in the screen above, Click Next.
Add the Oracle Linux ISO as a bootable Drive.
In the Oracle VM VirtualBox Manager, click and Highlight the new virtual Machine “OEL6” that we created.
In the right hand side of the window you will see the details regarding this new image.
Now would be a good time to click on “System” and increase the memory allocated to the Virtual Machine to 2Gb and the Number of Processors to 2.
Then click on “Storage”, which brings you to the screen below.
Click on the icon pointed to by the Red Arrow in the Figure Above, to create a new Dvd Drive.
Choose the Oracle Linux 6 iso image that you just downloaded from edelivery.oracle.com.
This action will result in a new DVD drive being displayed in the storage screen, as in the Figure above. Click OK and return to the “Oracle VM VirtualBox Manager” main screen.
Install Oracle Linux 6 Update 4
In the Left panel of the Main Menu, Highlight your new Virtual Box image “OEL6”, and click on “Start”. It brings up the screen below
Hit Enter, it will Bring you to the screen below
In this screen i chose to skip the test of the media, tab to skip and hit enter.
In this screen i chose “English”, hit Enter
In this screen i chose “U.S English”, hit Enter
Choose “Basic Storage Devices” and in the next screen Choose “Yes Discard Any Data”
In the above screen, i left the hostname as “localhost.localdomain” and did not configure networking. (Configured these manually later).
It autodetects your timezone, click Next.
Enter a password for the root user and click Next
Choose “Use All Space” and click Next, Confirm “Write Changes to Disk”, Click Next.
I chose “Database Server” in the screen above. Keep in mind that once you do this, you do not get a GUI to login to the machine. All access has to be via the command line. If you want a GUI, you can choose “Basic Server”.
The above two screens appear when the installation is in progress, and as soon as the installation is complete.
Congratulations, you now have a OEL6 Update 4, 64 bit Virtual Box image !!!
Configure Networking and Hostname
At this point it would be best if you configure the virtualbox image to use a “Bridged Network”, so that it can communicate with a ULN server, to get the updates and required packages.
This sets up a static IP address and plumbs up eth0 after reboots.
Install Pre-requisite RPM’s (For a 12cR1 oracle installation)
Login as root
Run “yum update” (This will bring any new versions of installed packages that are available on public-yum)
Run “yum install oracle-rdbms-server-12cR1-preinstall” (This will install all the pre-requisite rpm’s, setup the oracle user, setup the oinstall and dba groups, update kernel parameter settings and security settings required for an oracle installation).
Most of the work is done, you are almost there.
Create Additional Hard Disks
I like to separate my binary and database installations into separate hard disks, so now i go ahead and create two additional hard disks.
Create two new hard disks in Virtual Box
From the Oracle VM VirtualBox Manager, click on your Virtual Box Image “OEL6”
Click on Storage in the right hand side panel.
Click on the Hard Disk Icon next to “Controller SATA” pointed to by the Red Arrow
Click on “Create New Disk”
Choose “VDI” for hard disk file type
Choose “Dynamically allocated” for allocation type
Choose the proper File Location and File size as 10GB
Follow the above procedure and add a second hard disk (This one 20Gb) as shown below.
Now you should have two additional hard disks in this Virtual Box Image.
I will be using the disk OEL6-u01 as the device for the /u01 (10Gb) file system and OEL6-u02 as the device for the /u02 (20Gb) file system.
Now when you reboot the Linux virtual machine, OEL6-u01 will show up as /dev/sdb and OEL6-u02 will show up as /dev/sdc.
Partition, Format and Mount the hard disks
Once the devices are created and the VirtualBox Virtual machine has been rebooted, login as root.
Use the fdisk -l commands as shown above, to check that the disks /dev/sdb and /dev/sdc exist and are the correct sizes.
Partition the disks as shown above.
Format the disk /dev/sdb1 as shown above. Repeat the process for /dev/sdc1
Add the entries shown above to /etc/fstab so that the filesystems are mounted everytime you reboot the machine.
At this point, i shut down the virtual machine and switched it from using a “Bridged Network” to using a “Host Only” network.
Now we have a Oracle Linux 6 Virtual Machine that is ready for a Oracle 12c database Release 1 installation.
My next post will walk through the steps to install a single instance Oracle 12c Release 1 Rdbms Environment.